Documentation
Unbox docs
What every screen does, what every setting changes, and how to connect a provider key. Written against the shipped app.
Getting started
Quick start
Three steps, about five minutes. No terminal, no npm, no Docker.
- Install Unbox and open it.
- In the first-run wizard, paste an API key. OpenRouter is the recommended starting point and the wizard links straight to its key page.
- Type a prompt and press Generate.
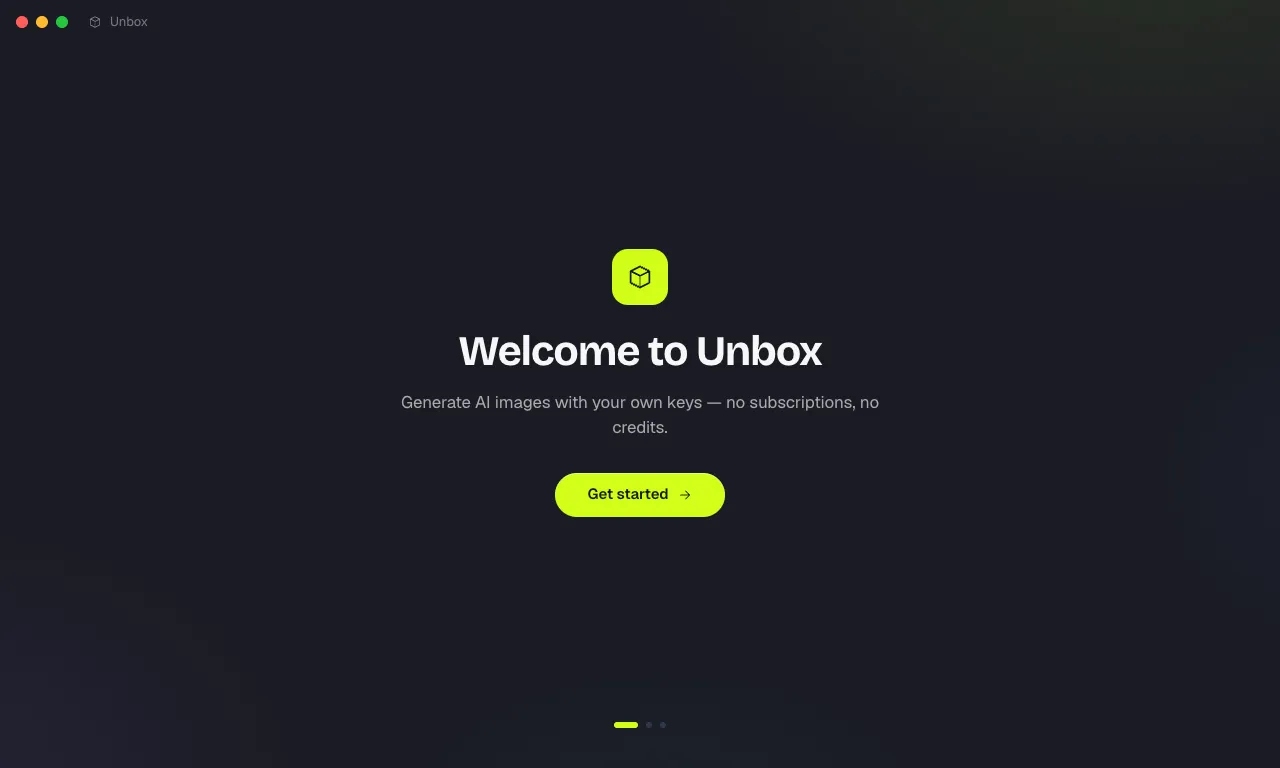
The first-run wizard
Three steps, with an escape hatch on the middle one.
- Welcome — branding and a single Get started button.
- Connect — pick a provider, open its key page, paste the key and validate it. The key is checked against the provider before Continue unlocks, so a typo is caught here rather than on your first generation. "Do this later" skips the step; you can add a key any time from Settings → Providers.
- First image — a pre-filled prompt runs on the default model so you see a real result before you land in the app.
First launch warnings
Builds are unsigned for now, so your operating system will complain once. This is expected.
- macOS — if it says the app is damaged, run xattr -cr /Applications/Unbox.app once, then open it normally.
- Windows — on the SmartScreen prompt, choose More info, then Run anyway.
- Linux — run chmod +x Unbox-*.AppImage before launching it.
Providers & keys
How keys work
Unbox has no account and no server of its own. Each key is encrypted on your machine and talks straight to the provider it belongs to.
- Your key is validated live before it is saved, so an invalid key is rejected at the point you paste it.
- Only the encrypted blob and the last four characters are written to disk. The raw key is never stored.
- On the desktop app, encryption is handled by your operating system — Keychain on macOS, Credential Manager (DPAPI) on Windows, Secret Service on Linux.
- The key is decrypted in memory only for the request that needs it, and is sent only to that provider.
- You can hold keys for several providers at once and switch between their models freely.
Adding, replacing and removing a key
- Open Settings → Providers. Every supported provider has a card.
- On a provider with no key, use "Get a key" to open its key page, paste the key, then press Validate. It saves on success.
- Once saved the card shows a masked key (last four characters) plus your remaining balance, if that provider exposes one.
- Replace swaps the key for a new one. Remove deletes it. The toggle disables a provider without deleting the key — its models disappear from the picker until you switch it back on.
Provider reference
Where to get a key for each provider, and what the key looks like so you can tell you have pasted the right thing.
| Provider | Get a key from | Key looks like |
|---|---|---|
| OpenRouter — recommended | openrouter.ai/keys | sk-or-v1-… |
| Google Gemini | aistudio.google.com/apikey | AIza… |
| fal.ai | fal.ai/dashboard/keys | key_id:key_secret |
| Black Forest Labs | docs.bfl.ai | bfl_… |
| Replicate | replicate.com/account/api-tokens | r8_… |
| DeepInfra | deepinfra.com/docs | di_… |
| NVIDIA NIM | build.nvidia.com | nvapi-… |
| kie.ai | kie.ai/api-key | no fixed prefix |
OpenRouter is recommended because one key reaches many image models, which is the shortest path from install to first image.
Local and self-hosted servers
Four providers need an address as well as (or instead of) a key.
| Provider | What you supply | Default address |
|---|---|---|
| Custom (OpenAI-compatible) | Base URL, token optional | http://localhost:11434 |
| AUTOMATIC1111 | Base URL, token optional | http://localhost:7860 |
| Hugging Face Endpoint | Your endpoint URL plus an hf_… token | none — paste your endpoint |
| RunPod | Your endpoint ID plus an API key | none — paste your endpoint |
Use "Add a service" in Settings → Providers for OpenAI-compatible servers such as Ollama or LM Studio. Pick the format, give it a name and address, then press Test connection — Unbox discovers the available models where the format supports it, and otherwise lets you name a model yourself.
When a key is rejected
Errors are mapped to plain-language hints rather than raw status codes.
| What you see | What it means |
|---|---|
| Key was rejected | Wrong or revoked key. Re-copy it from the provider. |
| Out of credits | The key is valid but the account needs funds at the provider. |
| Rate-limited | Too many requests. Wait a moment and retry. |
| Provider server error | The provider is having trouble. Not something on your side. |
| Add a key in Settings → Providers | You generated on a model whose provider has no key stored. |
Using the app
The layout
A sidebar on the left, the studio in the middle, the inspector on the right.
- Sidebar — New session, a search box, then your projects, pinned sessions and recent sessions. Your spend this month sits at the bottom.
- Studio — the session thread with every prompt and its outputs, and the composer along the bottom.
- Inspector — presets, plus an Advanced group holding the seed.
- Screens — Gallery, Assets, Characters, Presets, Tools and Settings.
The composer
The strip at the bottom of the studio where a generation is assembled.
- Prompt box — type or paste. Typing @ opens a picker of earlier outputs and attached references so you can point at a specific image.
- References — drop images straight onto the composer, or use Attach. The most recent output in the session is offered automatically as a reference, and you can remove it. Each reference gets a role: Person, Product, Style, Scene or Other.
- Enhance — rewrites your rough prompt into a fuller one.
- Surprise — writes a whole prompt for you from nothing.
- Auto-refine — a toggle that quietly improves every prompt just before it is sent. Anything generated this way is badged so you can compare the original against the refined version afterwards.
- Model, aspect ratio, count and size — the pills on the right. Count runs 1–4, capped by what the model supports.
- Generate — shows the estimated cost before you commit.
Choosing a model
One picker across every provider you have connected, with prices attached.
- Open it from the model pill in the composer or with Cmd/Ctrl+Shift+M.
- Browse by provider, or search across all of them at once.
- Filter to edit-capable models or to your favourites, and star anything you reach for often.
- Each model shows its price per image, so the cost is visible before you pick.
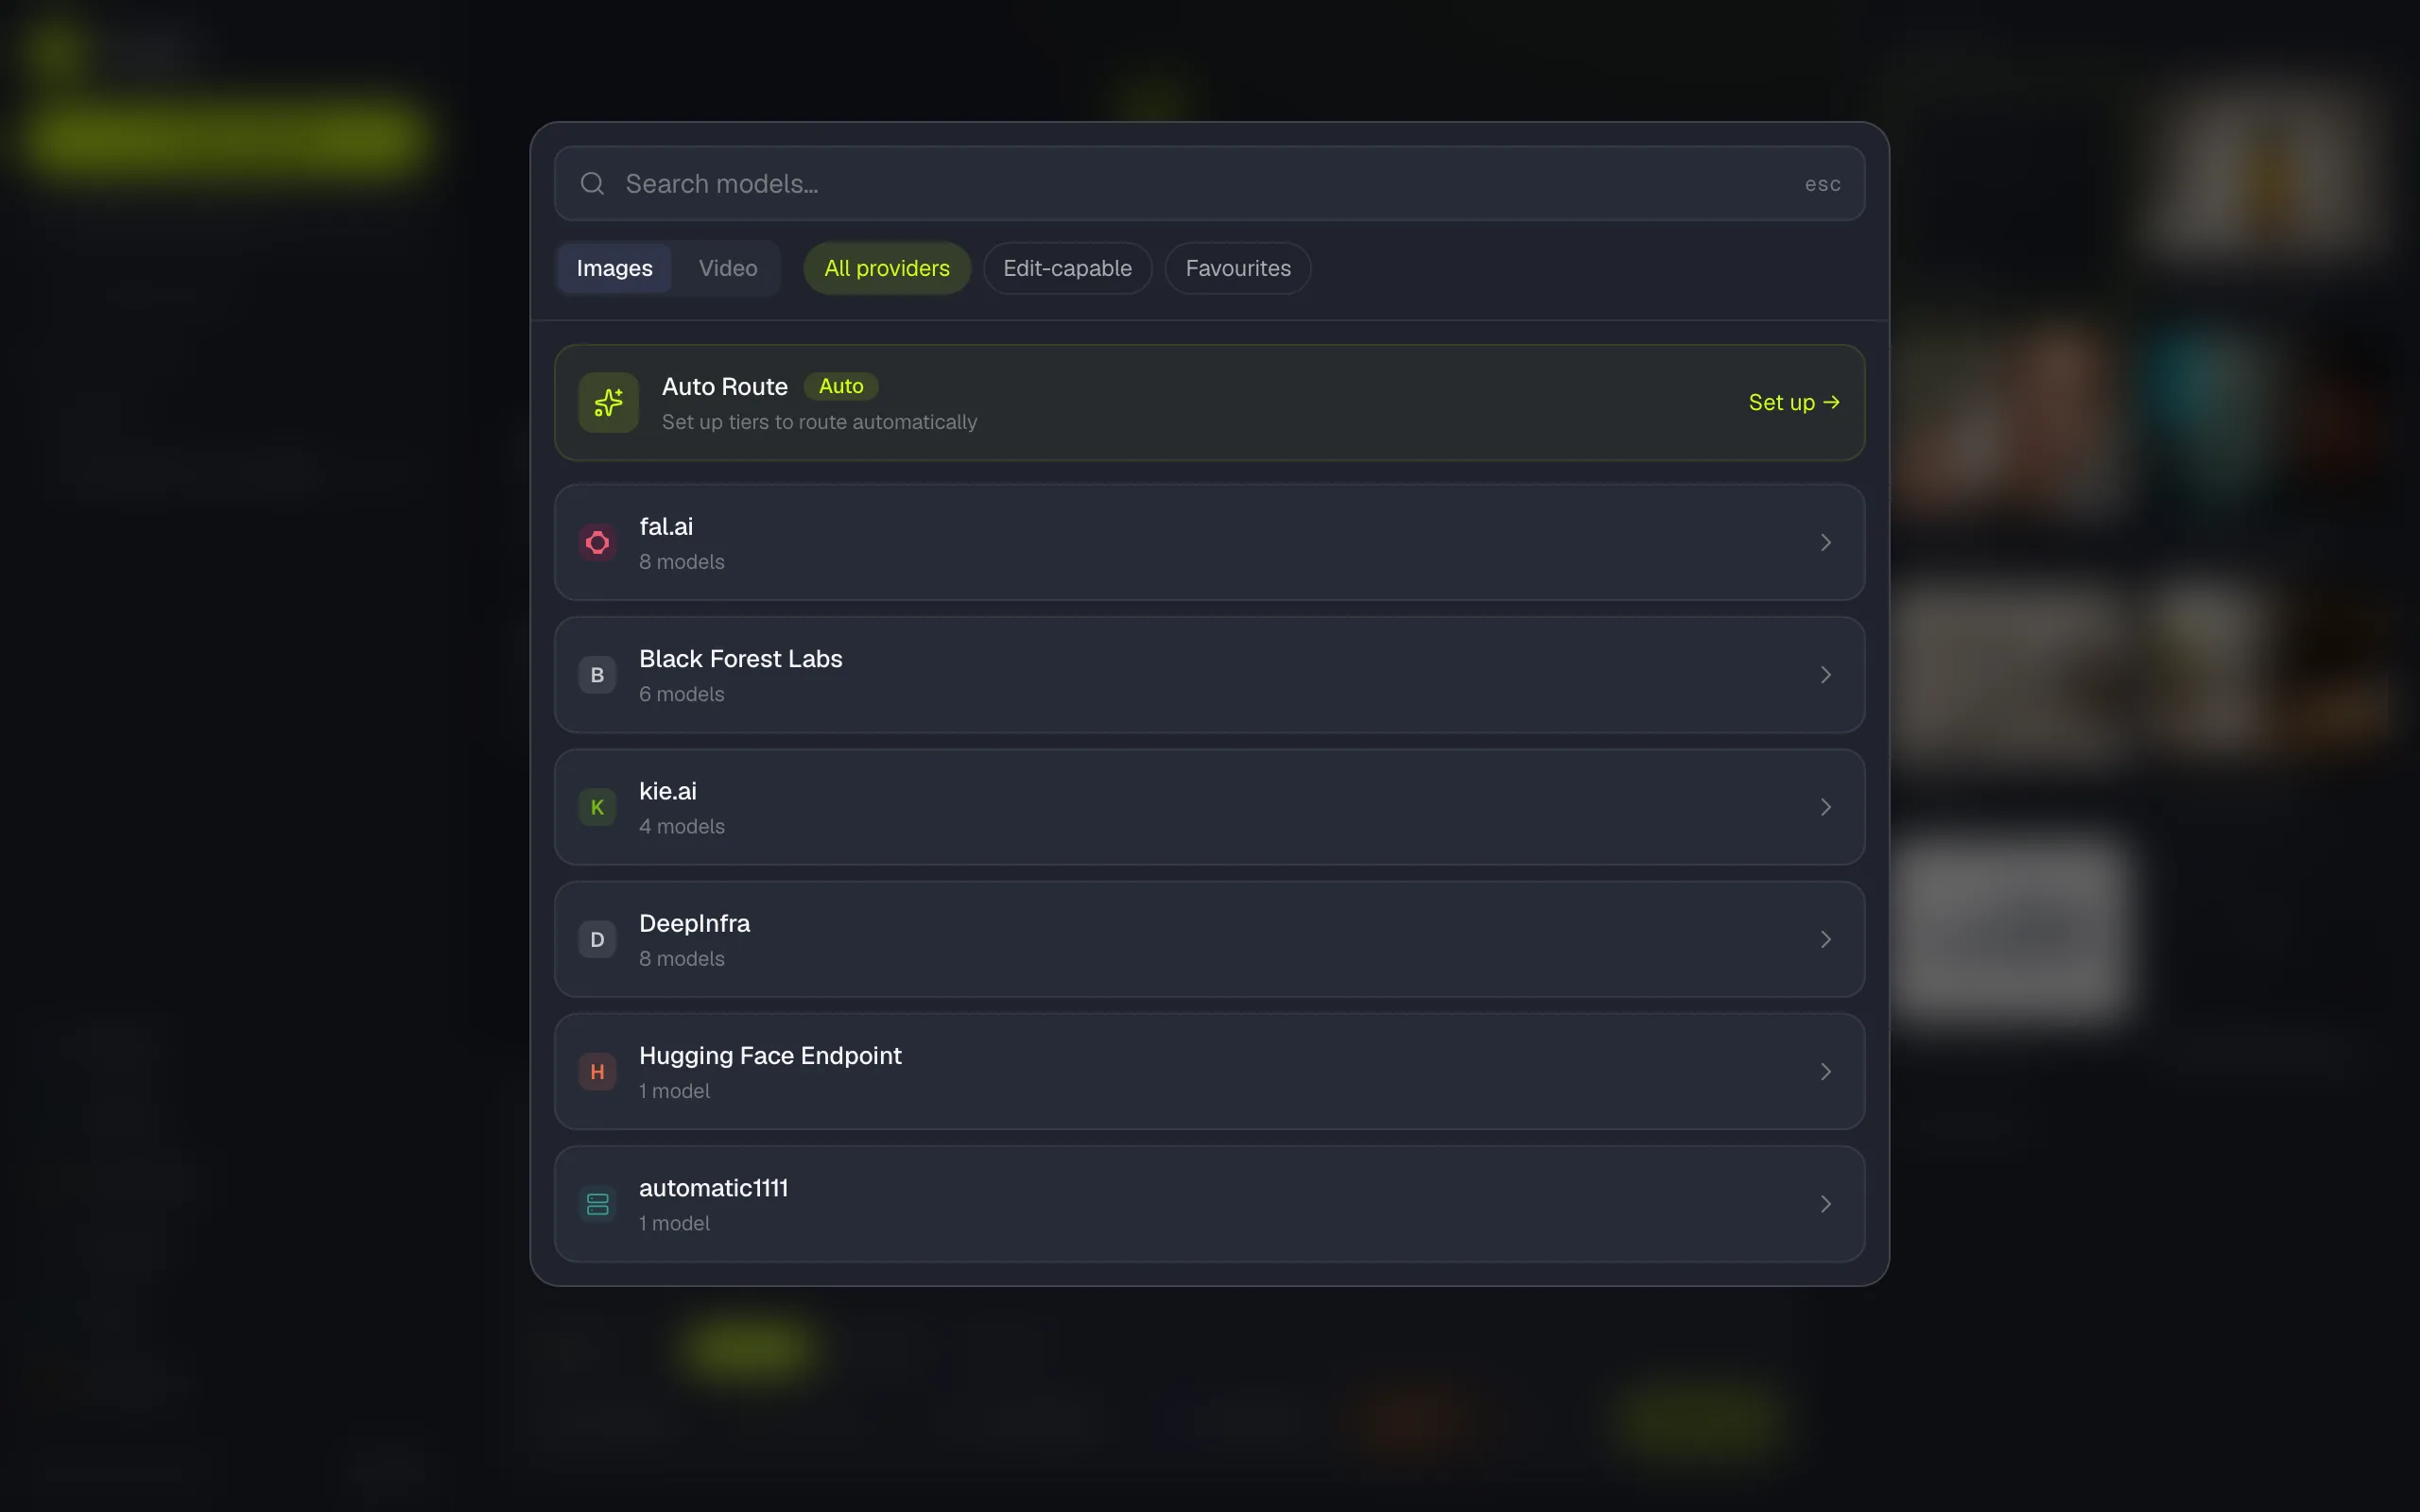
Auto Route
Picks a model for you when you would rather not think about it.
Auto Route sits at the top of the model picker. Instead of naming a model, you nominate one for each of three tiers — Low-fi, Mid-fi and Hi-fi — in Settings → App, and Unbox reads the prompt to decide which tier it deserves.
- It becomes available once at least one tier points at a model from a connected provider. Until then the picker shows a "Set up" link instead.
- Tier classification is done by the Assistant, so Auto Route needs that configured too.
- Open any Auto Route result and the details panel tells you which tier was chosen and why, with a "Re-run at hi-fi" button if you want the better version.
- It applies to images, not video.
Presets
A named style you apply instead of retyping the same instructions.
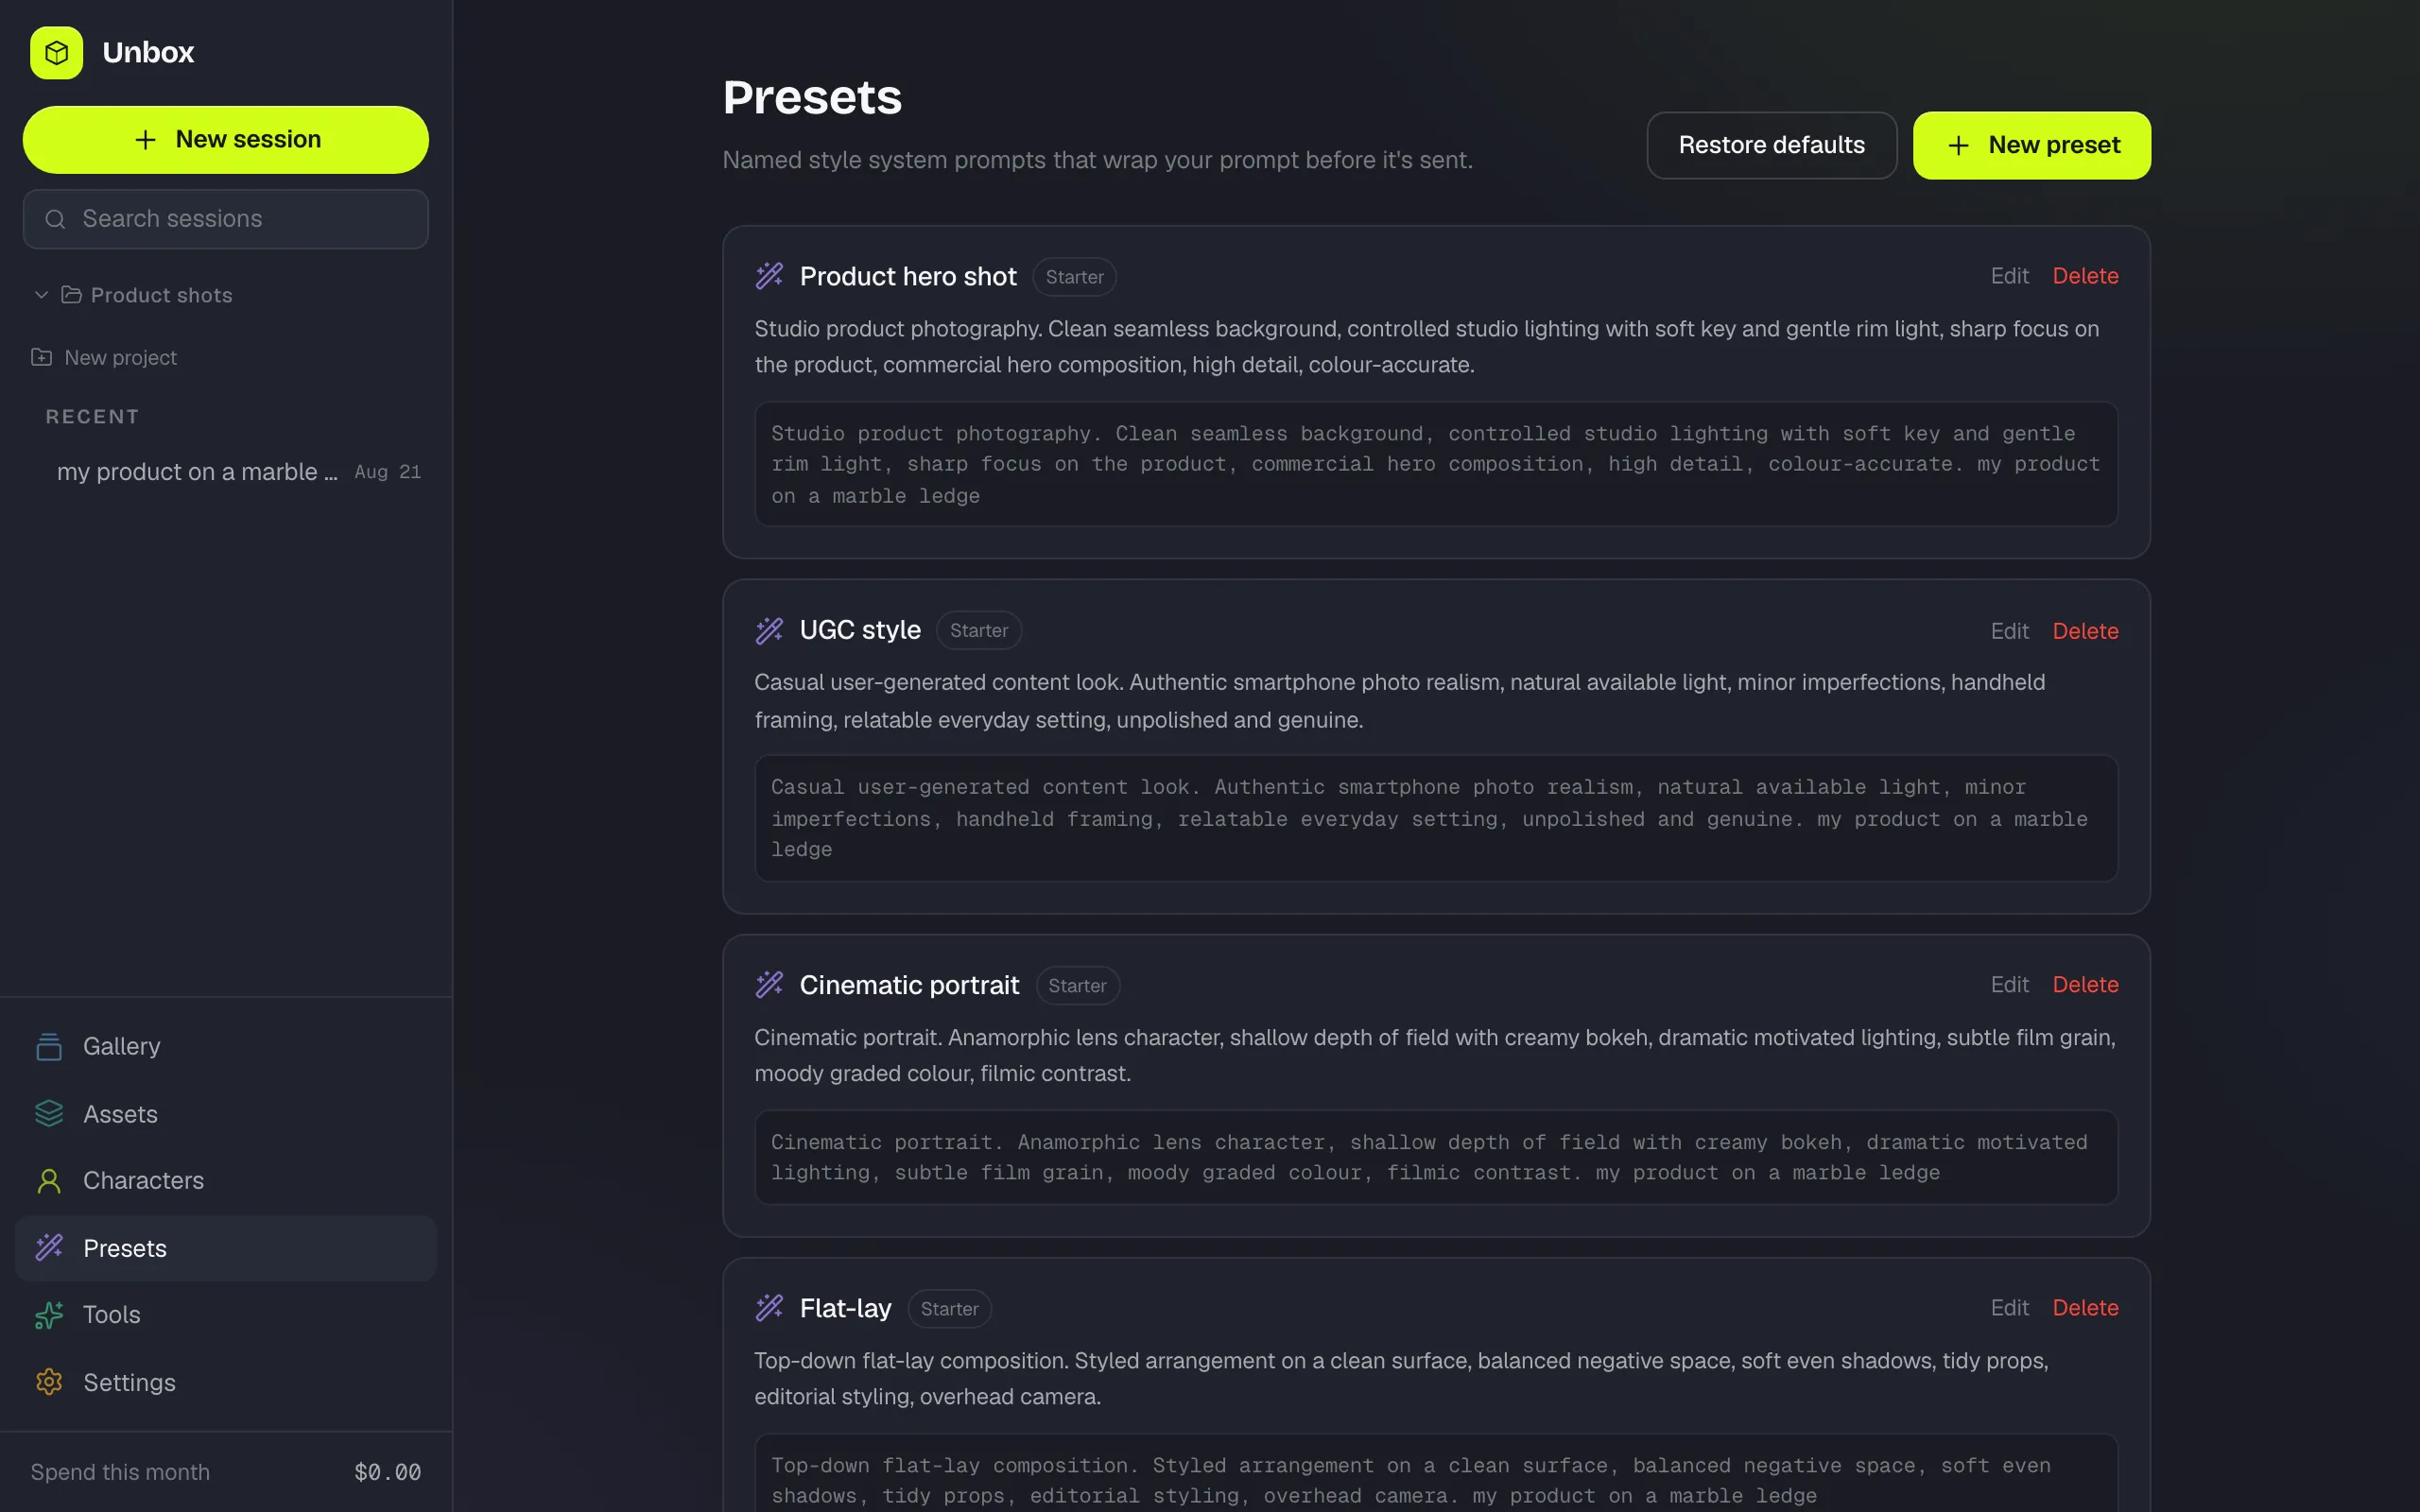
A preset holds a system prompt that wraps whatever you type. Pick one in the Inspector and it applies to every generation in that session until you change it. The editor previews how your wrapper reshapes a sample prompt, and can suggest a name from the prompt you have written.
Six starter presets ship with the app — Product hero shot, UGC style, Cinematic portrait, Flat-lay, Lifestyle scene and Clean cut-out. They are badged as starters, and "Restore defaults" brings them back if you delete one.
Characters
One person, designed once, reused across everything you make afterwards.
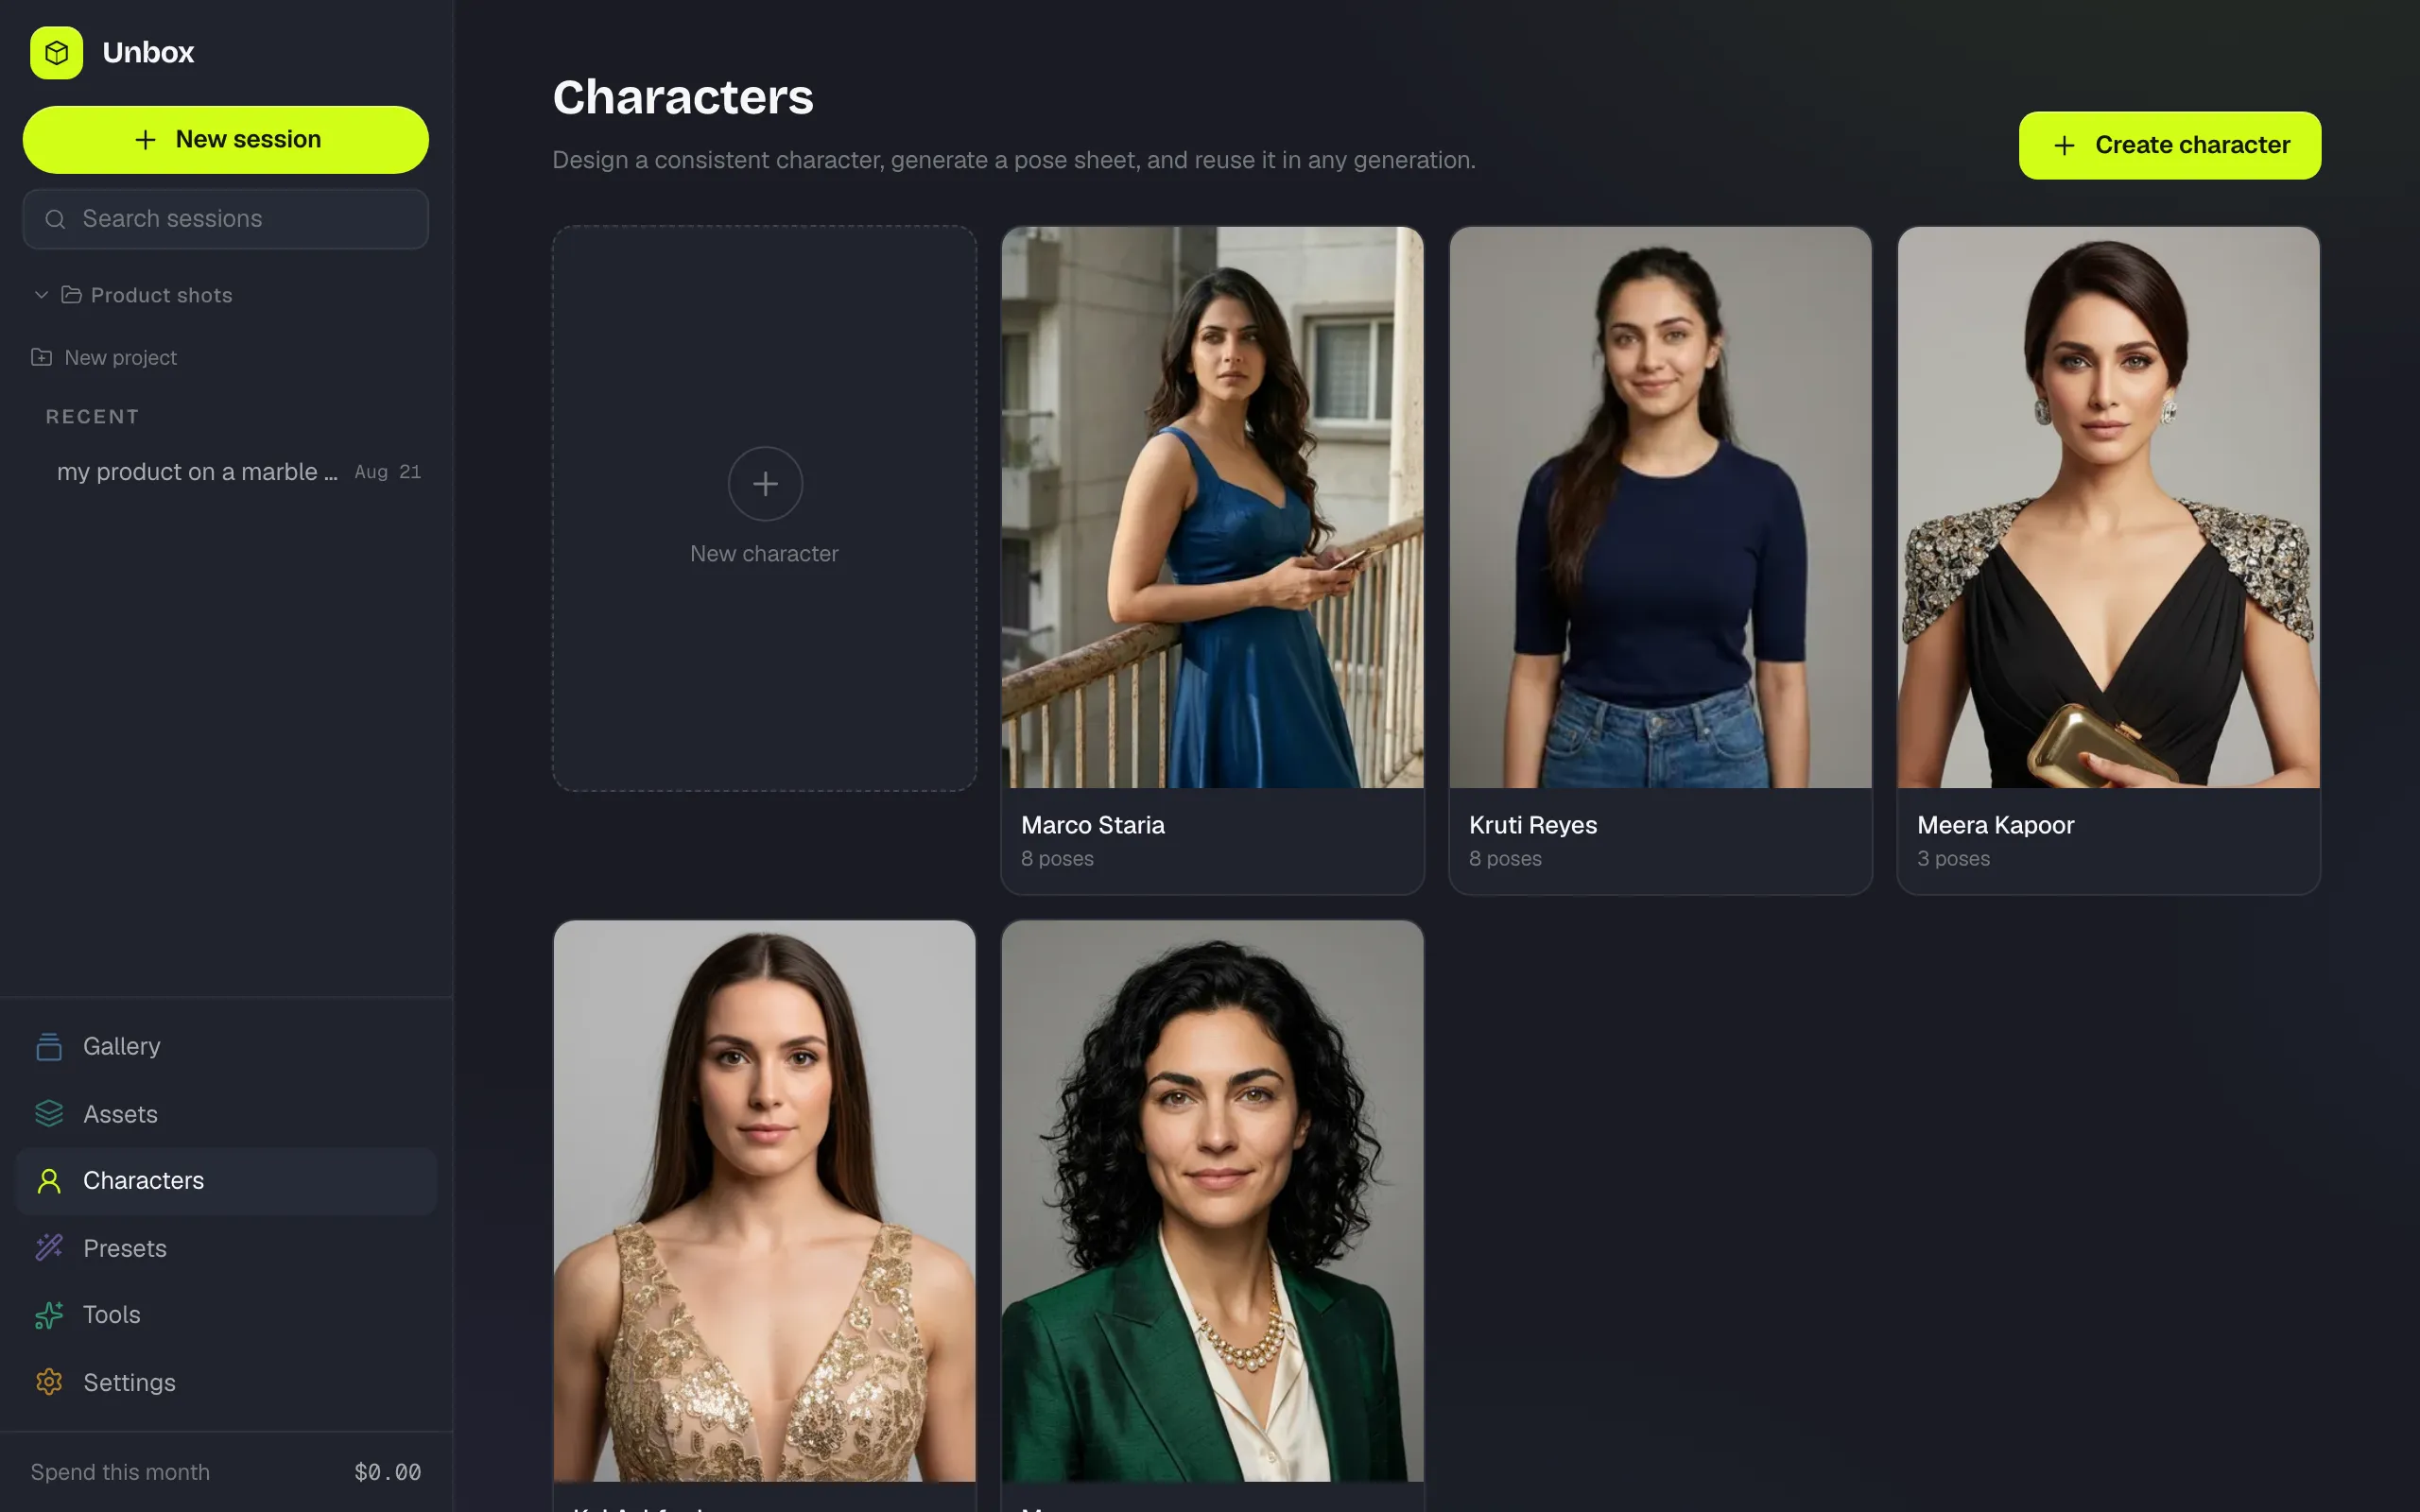
A character is a saved description of a person plus a sheet of generated poses of them. Once built, drop them into any generation and the same face comes back — no training, no fine-tune, nothing to wait for. Every character you have made sits on the Characters screen, and "Create character" starts the builder.
There are two ways in. Manual is a name, a free-text description and optionally a photo — fastest when you already know exactly who this person is. The Wizard asks one question per screen, most of them answered by picking a picture rather than describing one.
- Identity — gender presentation, age range and heritage.
- Appearance — build, skin tone, hair style, hair colour, eyes, facial features and distinguishing marks.
- Style — wardrobe, aesthetic and vibe.
- Reference & Review — name, render medium, an optional backstory, an optional reference image, and the pose set.
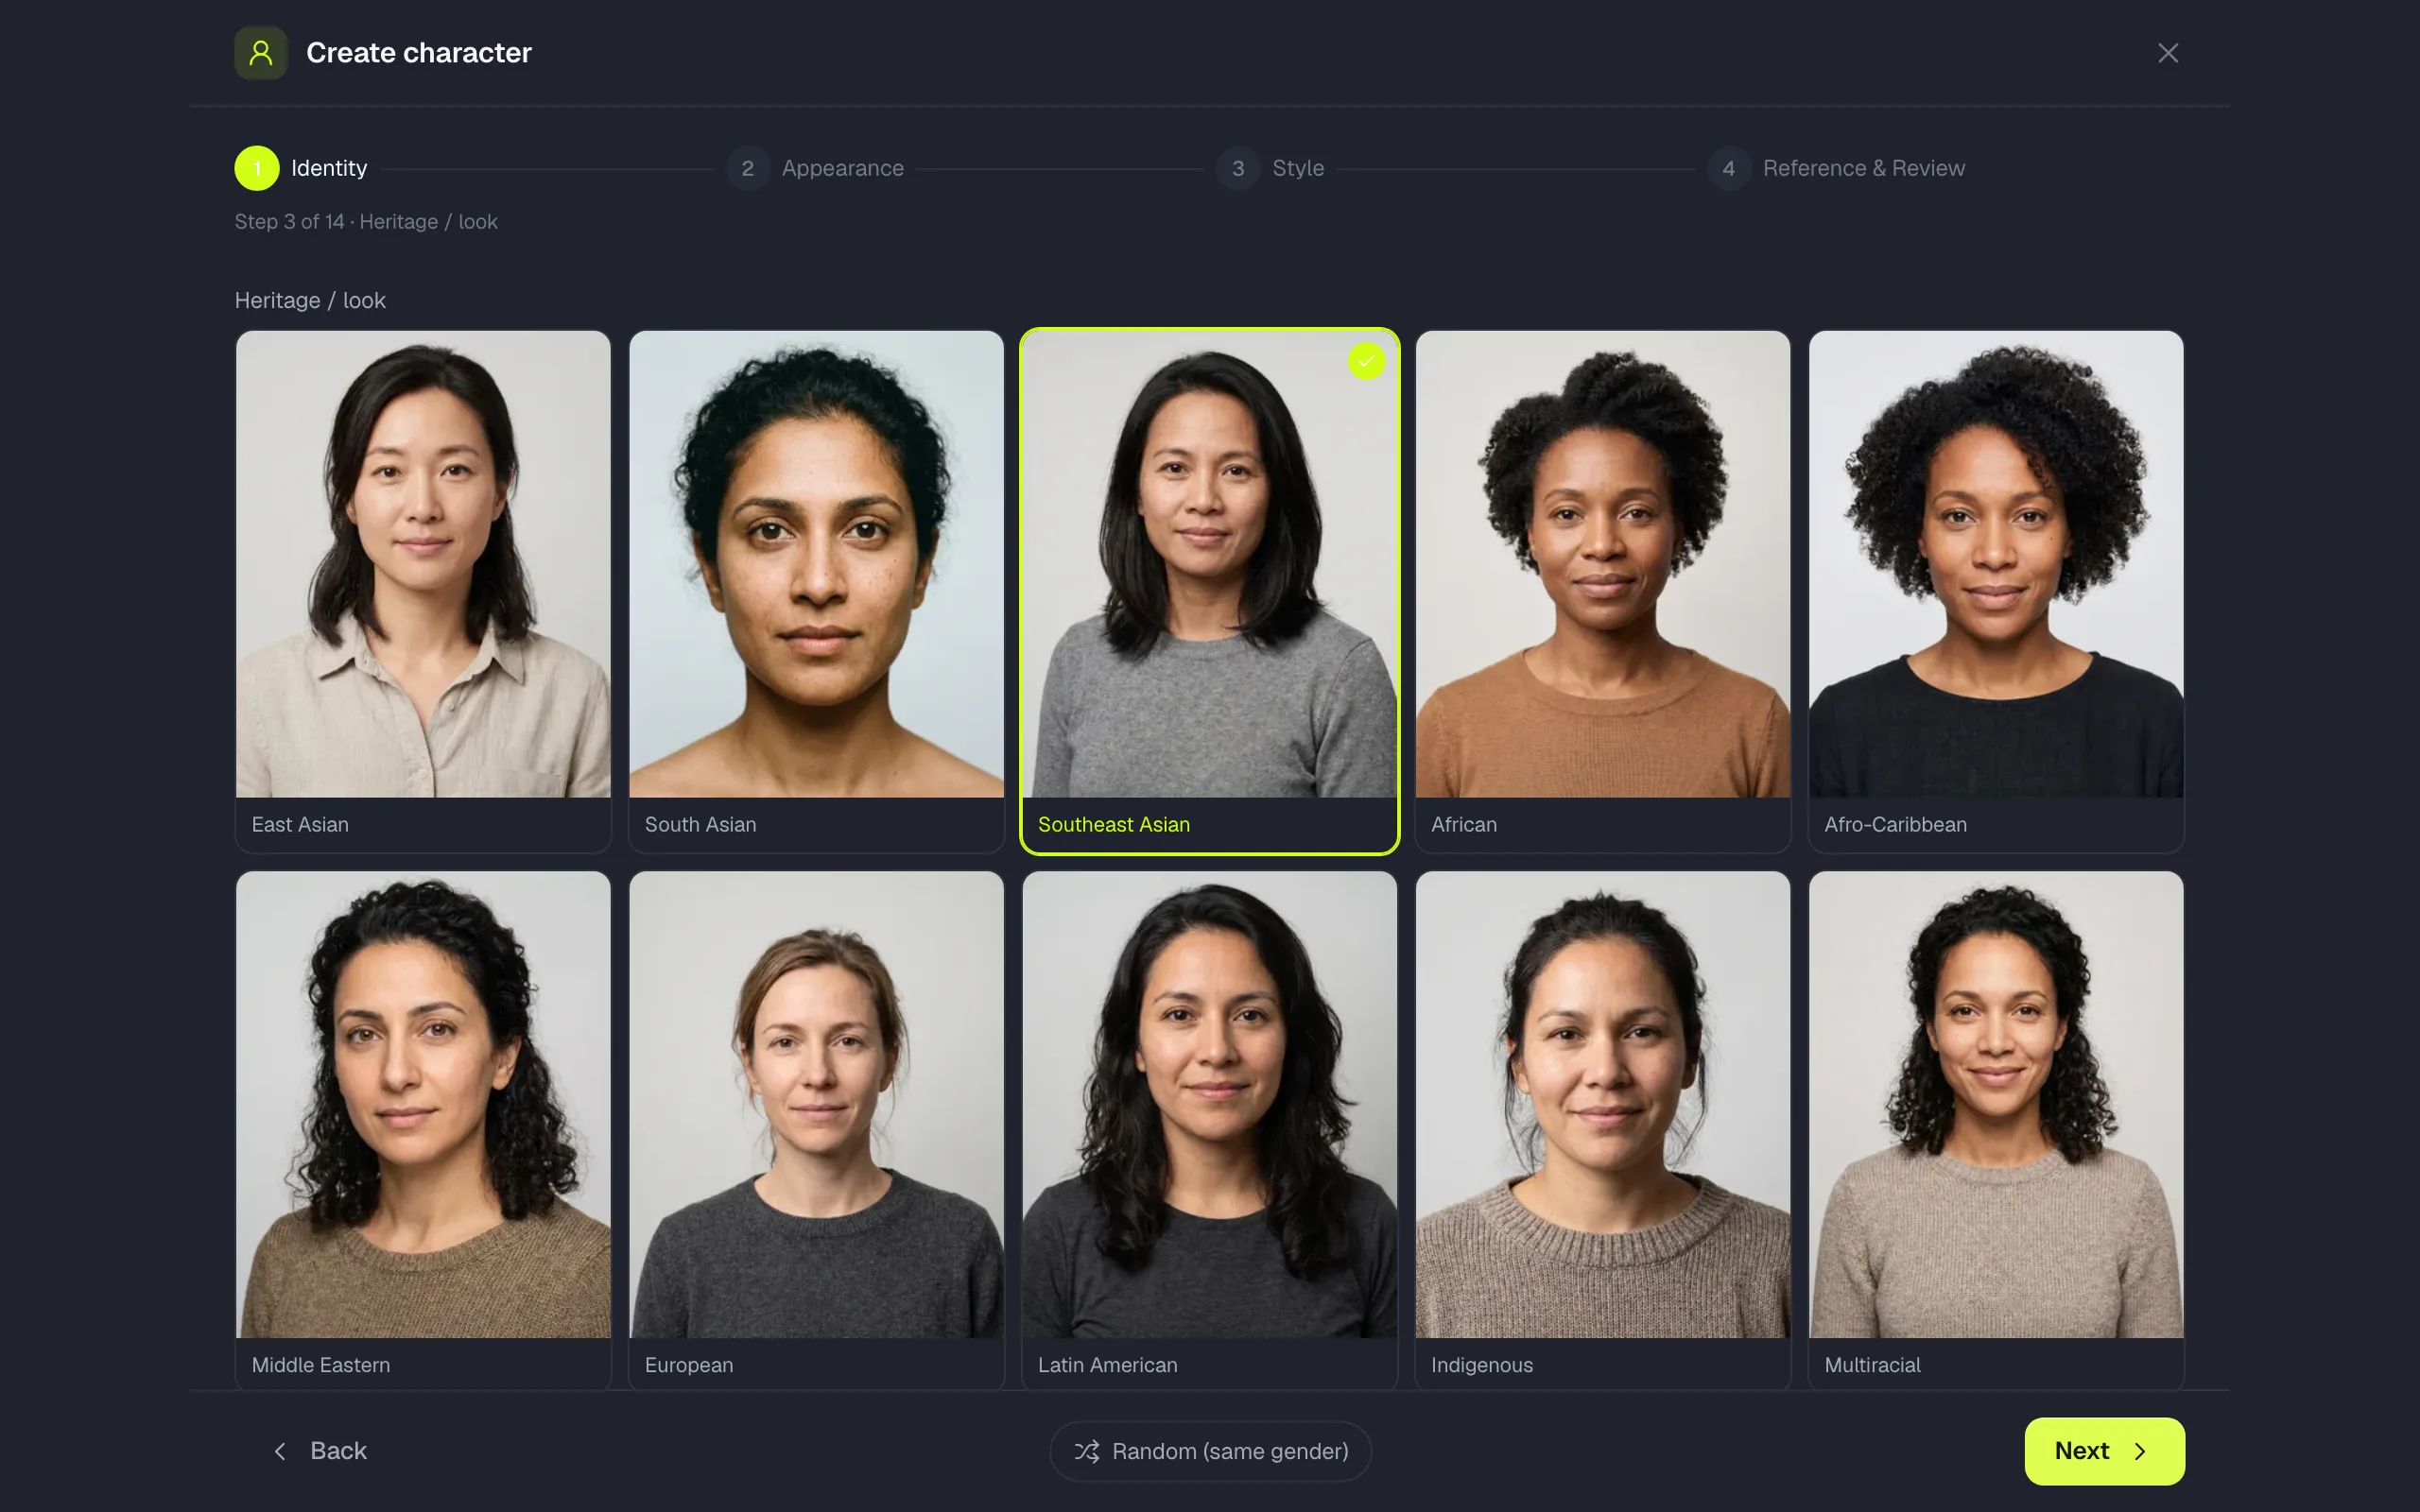
Only the name and the wardrobe have to be answered. Skip anything you do not care about and the defaults apply, or take one of the shortcuts on the way through.
- Describe them in words on the first screen — "a retired detective with dry humour" — and the assistant pre-fills every answer it can recognise.
- Or hand it a photo on the first screen: the whole image is locked in as the reference and the answers are read off it.
- "Use image as-is" adopts your photo as the canonical pose directly and skips the questions altogether.
- "Random (same gender)" fills every remaining answer at once — the quickest way to see what the options actually do.
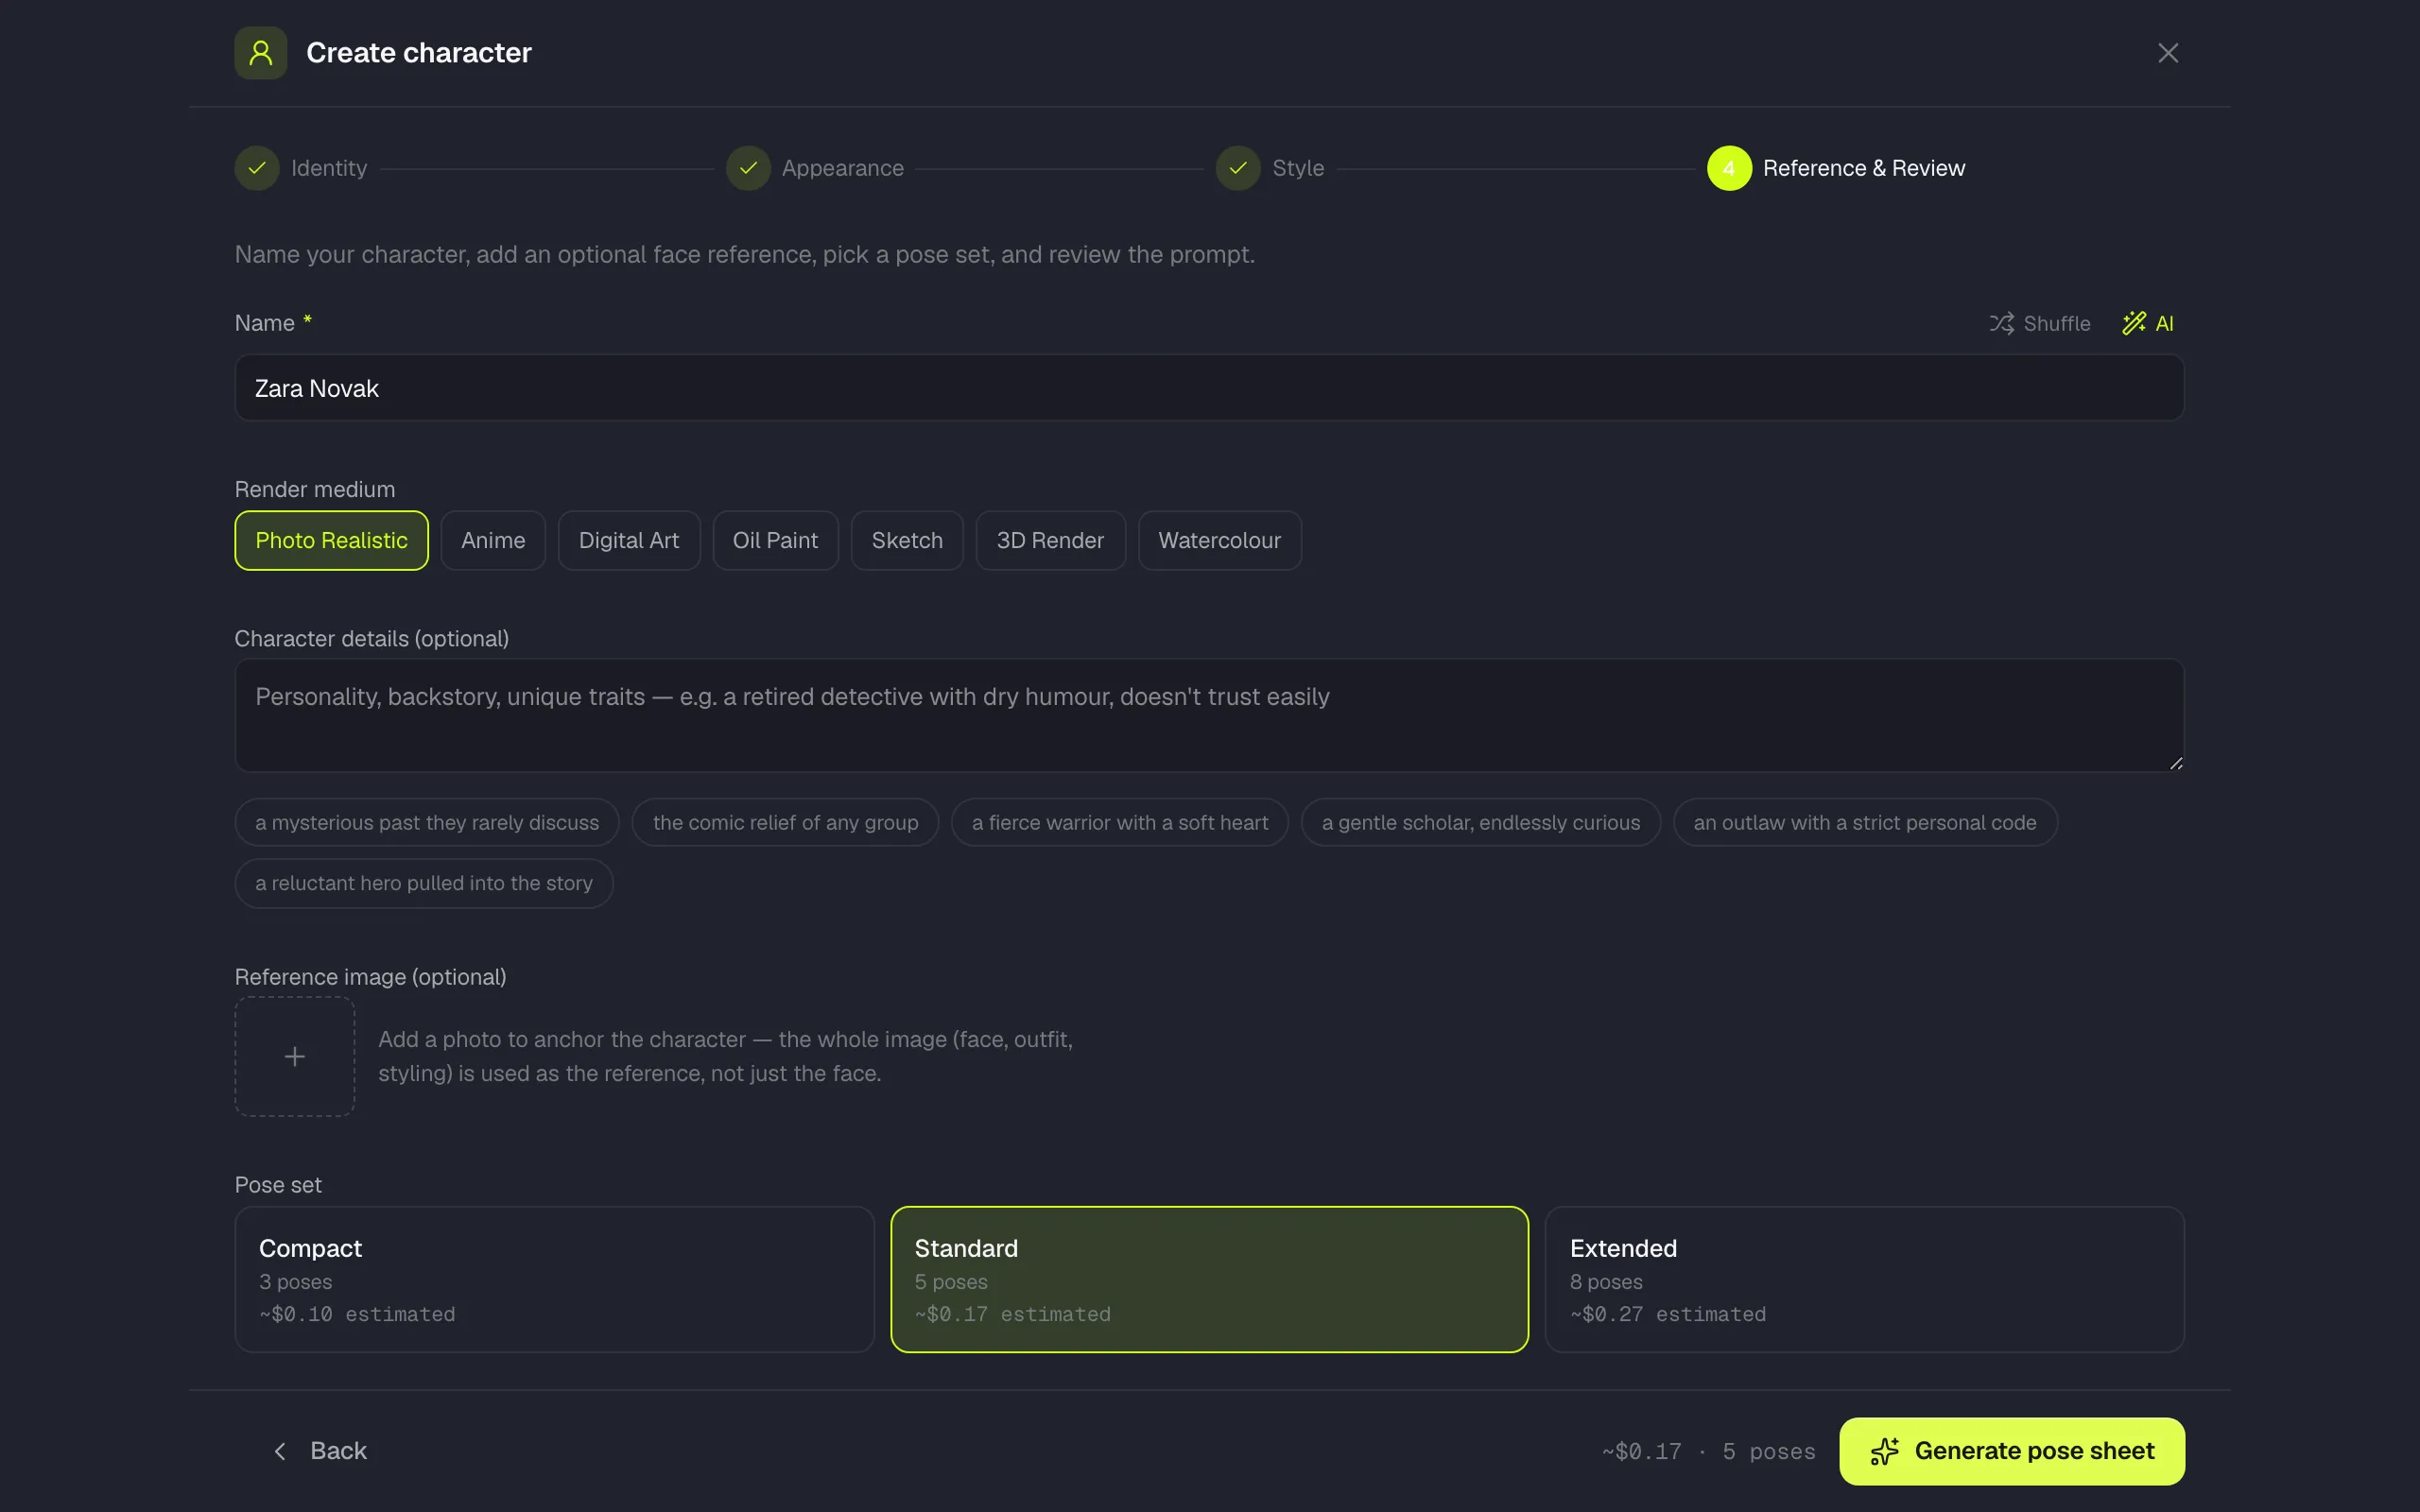
The last screen is where the character is priced. Render medium sets the output style — Photo Realistic, Anime, Digital Art, Oil Paint, Sketch, 3D Render or Watercolour. Character details is free text woven into the prompt. A reference image anchors the likeness, and it is the whole image that is used — face, outfit and styling — not just the face. Then you pick how many poses to generate.
| Pose set | Images | What you get |
|---|---|---|
| Compact | 3 | Front portrait, three-quarter view, full body |
| Standard — default | 5 | Adds a side profile and a close-up expression |
| Extended | 8 | Adds a back view, a seated shot and a walking shot |
Using a character
Keep the poses that worked, then drop the character into any generation.
When the sheet finishes you land on the character’s own page: every pose, an editable name and description, and the exact prompt that was assembled from your answers.
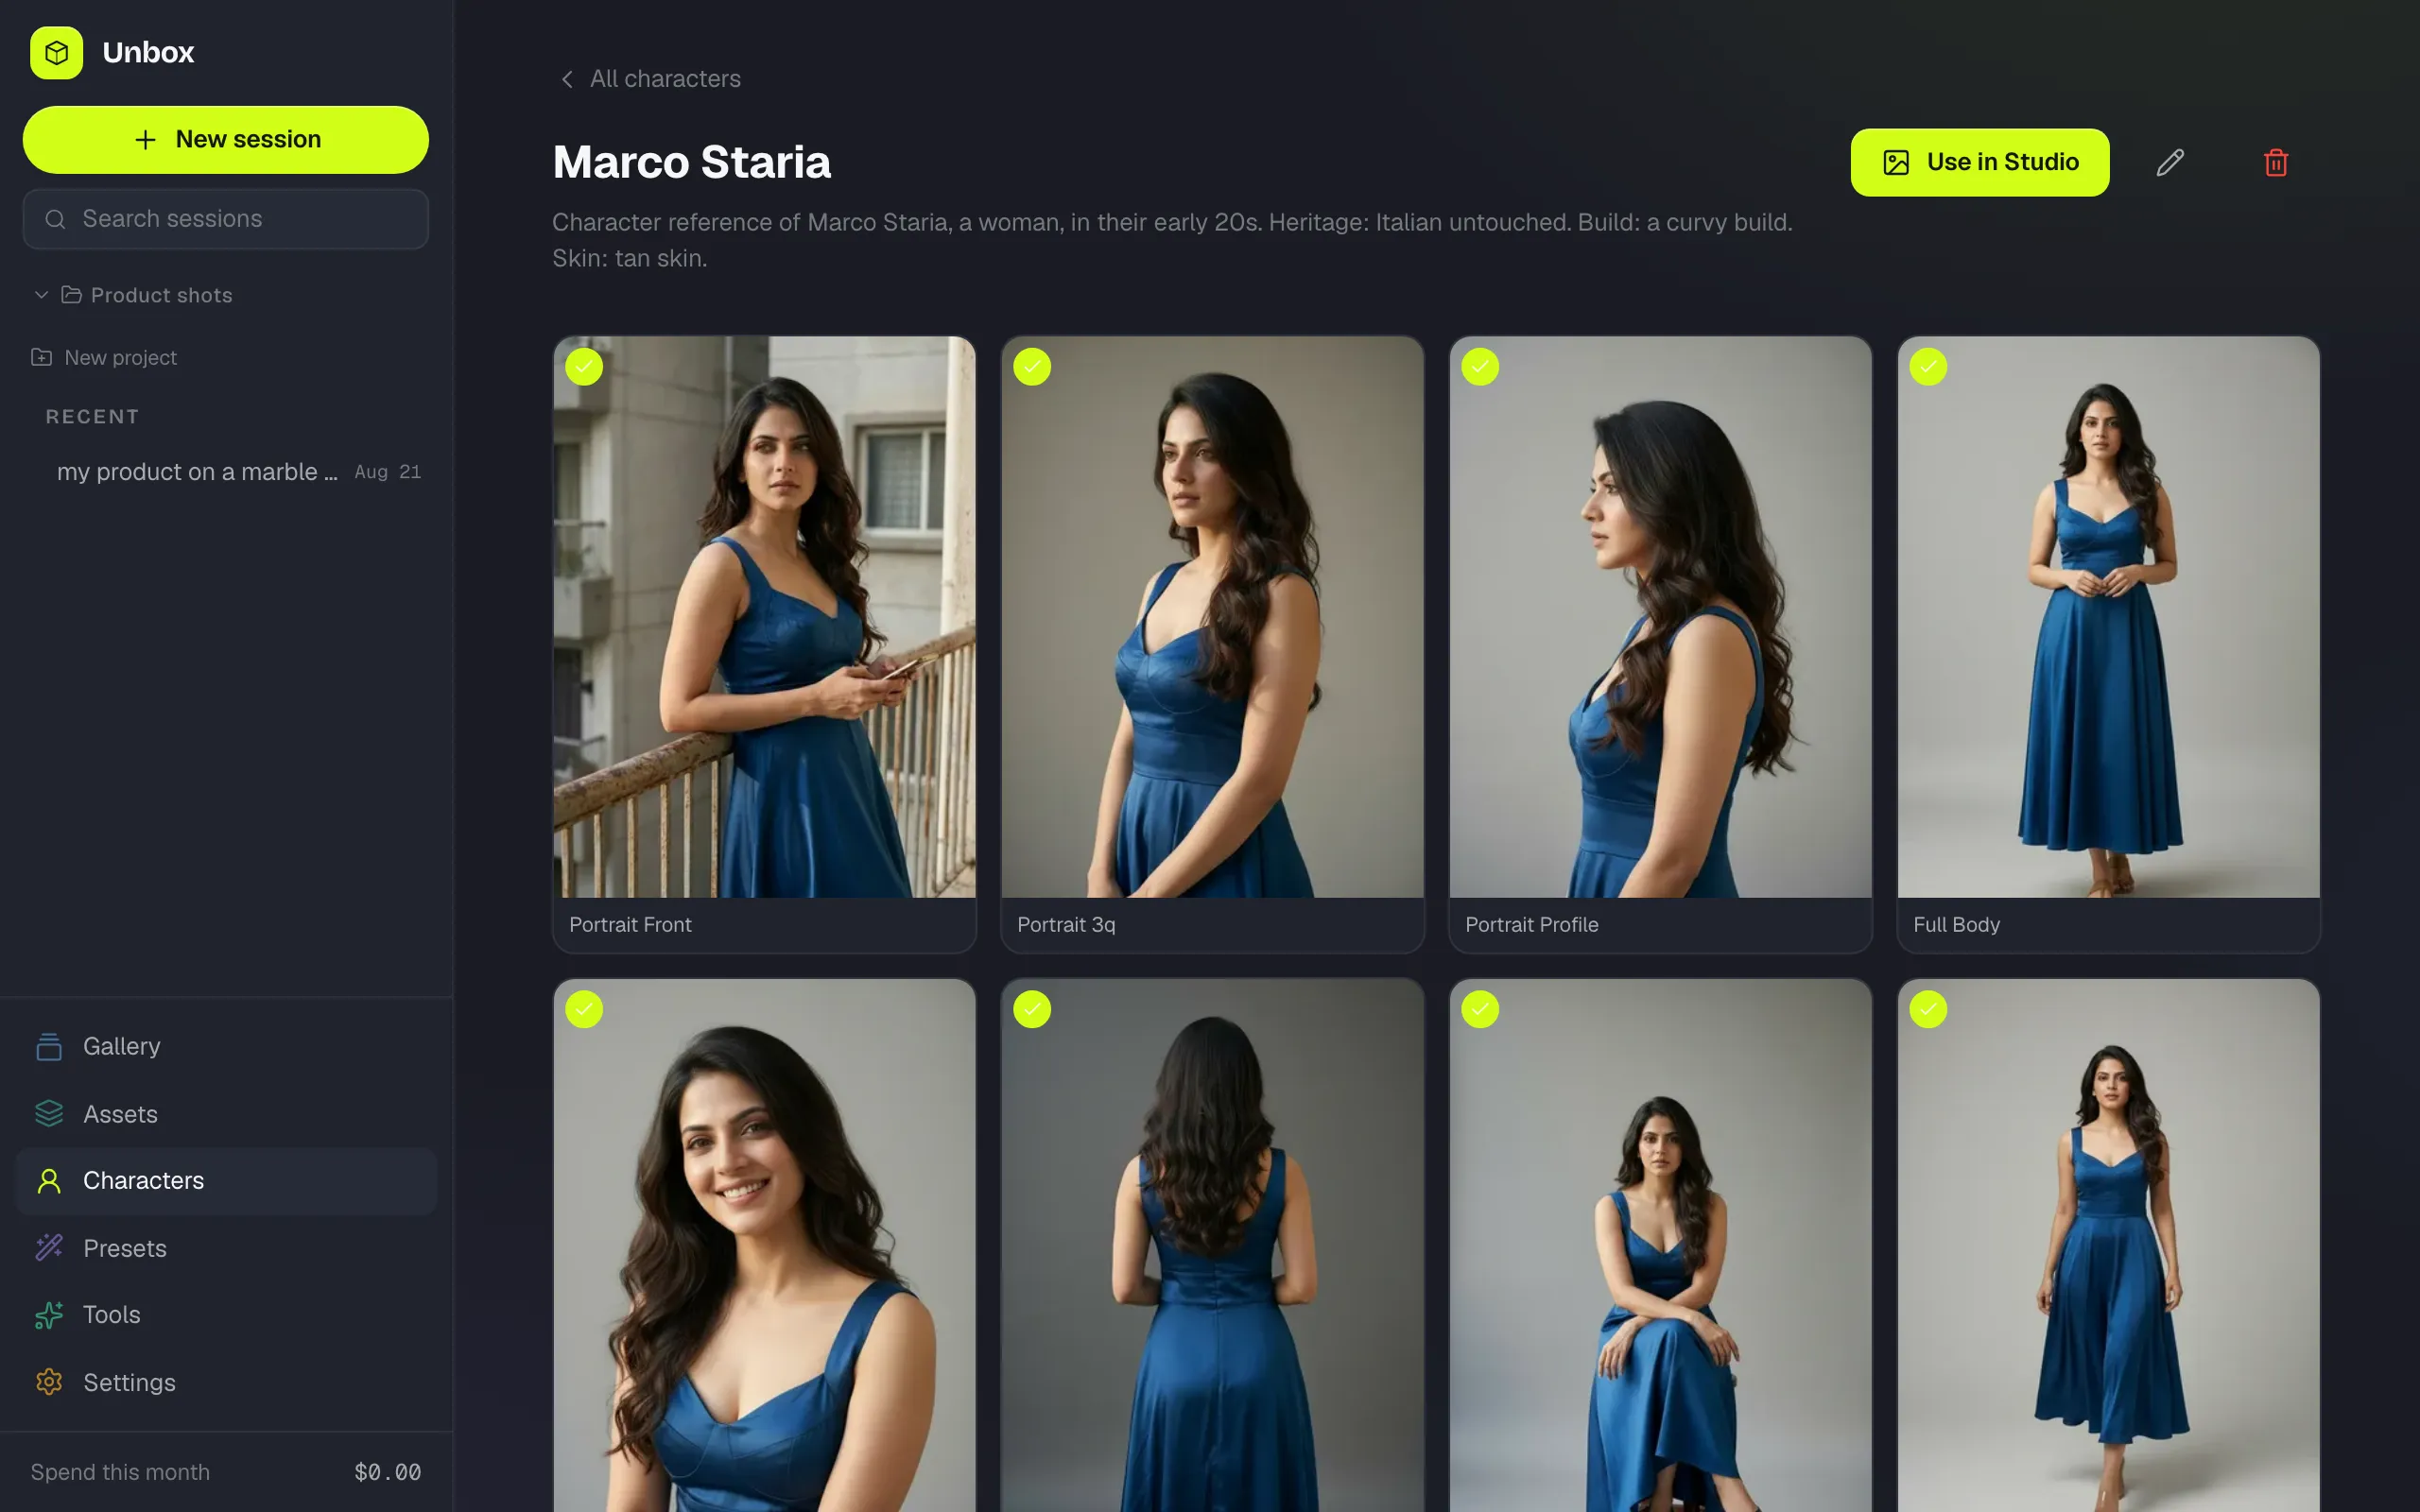
- Tick or untick a pose to include it in — or exclude it from — everything you reuse this character in. The canonical front portrait always stays selected.
- Regenerate a single pose from its tile. Failed poses can be retried the same way, without rebuilding the character.
- The description under the name is what gets injected into prompts in text mode, so it is worth writing properly.
- Copy lifts the full assembled character prompt if you want it elsewhere.
- The pencil re-opens the wizard on an existing character. From there you can save the details only, or save and regenerate some or all of the poses.
- Deleting a character removes all of its poses with it.
"Use in Studio" drops the character into the composer, where it sits as a chip with a three-way mode switch on it.
| Mode | What it sends | When to use it |
|---|---|---|
| Img | Attaches pose images as reference inputs | The strongest likeness. Consumes reference slots, and needs a model that accepts them. |
| Txt | Injects the character description into the prompt | Costs no reference slot and works on any model, including ones that cannot take images. |
| Both | Does both at once | When the likeness matters and you have the slots to spare. |
- The chip also carries a pose selector. Auto lets the assistant choose poses from what you have written; otherwise pin the specific poses you want.
- Characters can be combined with ordinary references — a character in Img mode plus a product shot is the usual way to put a person with a thing.
Assets
A library of reference images you reuse.
Assets are plain uploads, tagged as a character, product, style or other, and filtered by those tabs. Save an output straight from the studio or the lightbox, or upload from disk. From an asset card you can edit its details, push it into the composer as a reference, or delete it.
Gallery and the lightbox
Everything you have made, and everything you can do to one image.
The Gallery is a masonry grid of every successful output, newest first, filterable by project or to your archive. Clicking any image opens the lightbox, which is where most single-image work happens.
- Details — the exact prompt that was sent, model, provider, aspect, seed, cost and date.
- Refine — a cut-down composer with this image locked as the reference, so you can describe a change.
- Quick edits — six one-click operations: Upscale detail, White studio bg, Remove background, Brighten, Cinematic and Widen scene.
- Variations — two or four alternatives of the same image.
- Reframe — recompose to a different aspect ratio, extending the scene rather than cropping it.
- Export — download at a preset size or your own dimensions. On desktop you can also drag an image straight out to the Finder.
Tools
The same operations, applied to any image rather than one you just made.
The Tools screen exposes the six quick edits plus Reframe, run against an image you upload or pick from Assets. Each run opens a new session named after the tool, so the result lands in your history like any other generation.
Keyboard shortcuts
| Shortcut | Does |
|---|---|
| Cmd/Ctrl + K | Command palette — jump anywhere, switch model, open a session |
| Cmd/Ctrl + Shift + M | Open the model picker |
| Cmd/Ctrl + Enter | Generate, from the composer |
| Escape | Close the overlay you are in |
Settings reference
Providers
Keys, balances, local services and plugins.
Covered in full under Providers and keys above. This tab also holds "Add a service" for OpenAI-compatible servers, and a Plugins panel listing provider plugins found in the plugins directory. Enabling a plugin takes effect after a restart, and a plugin that failed to load is shown with the reason and cannot be enabled.
Models
Which models exist, which are visible, and which one is the default.
- Favourite — stars a model so it surfaces in the picker.
- Enabled — a disabled model is hidden from the picker without being deleted.
- Set as default — the model pre-selected in a new session. Same value as Default model in the App tab.
- Refresh models — re-fetches a provider’s catalogue. Needs a key for that provider.
- Add model — register a model by slug for a provider that does not publish a list.
Assistant
The text model behind Enhance, Surprise, Auto-refine and Auto Route tiering.
| Setting | What it does | Default |
|---|---|---|
| Enable | Turns the text assistant on. With it off, Enhance, Surprise and Auto-refine are unavailable. | Off |
| Provider | Which text provider to use: OpenRouter, OpenAI, Google, DeepSeek, Ollama or Anthropic. All but Ollama need a key. | OpenRouter |
| Model | The specific text model used for every assistant task. | A Gemini Flash model |
| Refinement prompt | The instructions the assistant follows when rewriting your prompt. Editing this changes how every refinement behaves; it can be reset. | A built-in prompt |
Usage
Read-only. Nothing to configure here.
Total spend, total generations, a per-provider breakdown and a daily chart of activity. Useful for answering "what has this actually cost me".
App
| Setting | What it does | Default |
|---|---|---|
| Default model | The model pre-selected in a new session. | A Gemini Flash image model |
| Auto Route tiers | Nominates the model behind Low-fi, Mid-fi and Hi-fi. At least one must be set for Auto Route to work. | Unset |
| Auto-update | Checks for and installs updates on launch. | On |
| Advanced mode | Relaxes the safety checker on fal.ai FLUX models. It has no effect on any other provider. | Off |
| Verbose logging | Switches the log to debug level. Worth turning on only when chasing a problem. | Off |
This tab also holds the maintenance actions: Export data writes a single archive of your sessions, generations, assets, presets, settings and image files; the log file path and viewer sit alongside it; and Purge media permanently deletes stored images, either everywhere or for one project, with an option to export a backup first.
Your data
What lives where
- On your disk — every session, prompt, generated image, asset, character, preset and your spend history, in the app’s own data directory.
- In your OS keychain — your provider API keys, encrypted.
- Sent to a provider — the prompt, any reference images attached to that generation, and the settings for it. Nothing else.
- Sent to Unbox — nothing. There is no Unbox account, no Unbox server and no telemetry.
Ready to try it?
Releasing soon. When it does: paste a key, make something — at raw API prices.
Coming soon